


When sod fails — why it happens and how hydroseeding replaces it the right way
You invested in sod installation and it did not work out the way you expected. Sections died. The roots never took hold. The lawn looks worse than it did before you spent the money. Or maybe the sod looked fine for a few weeks and then started declining as summer heat arrived and the transplanted root system could not sustain the grass through conditions it was not established enough to handle. Whatever the specific failure mode the situation is the same — you have dead or dying sod on your property and you need to figure out what to do next.
This guide covers why sod fails in Texas what the different failure patterns indicate about the underlying cause and why hydroseeding is often the most effective and most cost-efficient path forward when sod has not delivered the lawn you paid for.
Why sod fails in Texas
Sod failure in the DFW area is more common than most homeowners expect before they experience it. Several factors specific to North Texas conditions create challenges for sod establishment that are less significant in more forgiving climates.
Root re-establishment on clay soil is the most fundamental challenge for transplanted sod in North Texas. Sod is grown on soil that is optimized for production — loose well-drained and nutrient-rich conditions that allow rapid growth and easy harvesting. When that sod is transplanted onto the heavy clay soil typical of DFW residential properties the roots have to transition from one soil environment to a dramatically different one. That transition is slow and stressful and until the roots penetrate into the native clay the grass is entirely dependent on the shallow root mat of the transplanted sod rather than a genuinely established root system.
During the transition window — which can last weeks to months depending on the season and soil conditions — the sod is vulnerable to any stress that exceeds what the shallow transplanted root system can support. A stretch of heat and drought in the weeks after installation can kill sod that appears to have established on the surface but has not yet developed the root depth to sustain itself through heat stress.
Summer installation amplifies the vulnerability. Sod installed in June July or August in the DFW area goes immediately into the most stressful conditions of the year before it has had adequate time to re-establish. The combination of transplant stress and peak summer heat creates conditions where a narrow margin of irrigation management error can mean the difference between sod that establishes and sod that fails.
Poor site preparation is a frequently overlooked cause of sod failure. Sod installed over compacted soil that has not been properly graded and loosened develops roots that cannot penetrate beyond the transplanted mat — creating a lawn that looks established on the surface while being structurally fragile underneath. This type of failure often does not show up immediately — the sod looks fine in the weeks after installation and then declines progressively as the shallow root system proves inadequate for the demands of a full Texas summer.
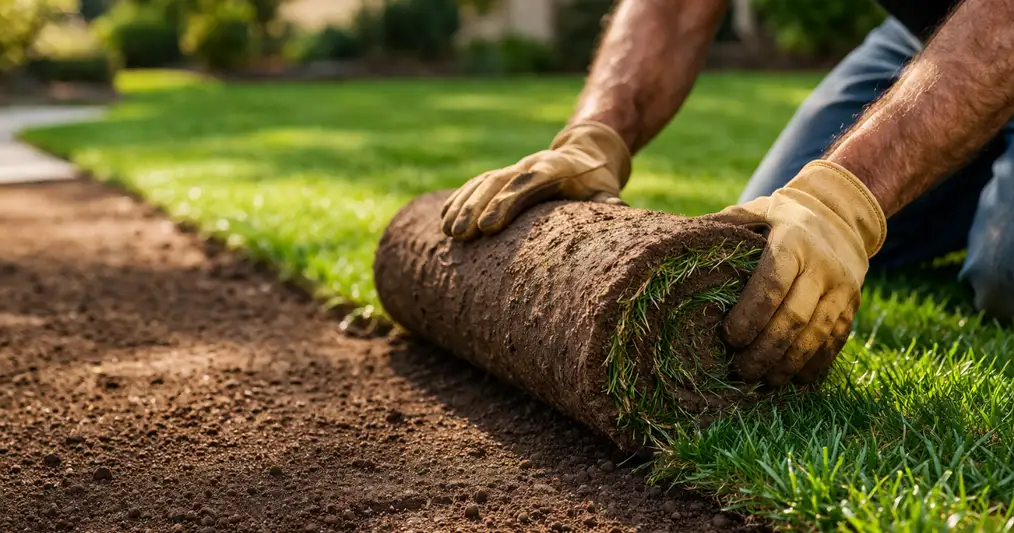
Installation quality affects outcomes significantly. Sod that is installed with gaps between pieces dries out at the edges before roots can bridge across. Sod that is not rolled or pressed adequately after installation has poor contact with the soil below and develops air pockets that prevent root penetration. Sod that is installed during a period of inadequate irrigation develops root zone drought before establishment is complete.
Soil pH and nutrient problems that are not addressed before installation limit the root environment that transplanted sod enters. Highly alkaline North Texas clay restricts nutrient availability in ways that affect establishment regardless of what fertilizer is applied to the surface.
Reading the failure pattern to understand the cause
Different sod failure patterns indicate different underlying causes and understanding the pattern helps determine what needs to be corrected before any replacement seeding produces better results.
Uniform failure across the entire sodded area — all sections declining at the same time and rate — suggests either a systemic issue like irrigation failure across all zones a soil chemistry problem affecting the whole area or seasonal stress from inadequate establishment time before peak heat arrived.
Failure in specific sections while other sections of the same installation perform acceptably suggests location-specific causes — drainage problems in the failing sections more severe compaction in those areas different sun exposure that created different establishment conditions or irrigation coverage gaps that left those sections underwatered.
Failure along edges and seams while the central sections of sod pieces survive suggests inadequate irrigation frequency for the edge drying that occurs naturally at sod piece boundaries combined with possibly inadequate installation contact at the seams.
Failure that appeared after several weeks of acceptable performance followed by a heat or drought event suggests that the sod was not fully established before stress conditions arrived — a timing and irrigation management failure that produced apparent establishment without genuine root depth.
Understanding which failure pattern applies to your specific situation tells you what underlying conditions need to be corrected before replacement seeding. Replacing the failed sod with the same product under the same conditions without addressing what caused the failure produces the same failure.
Why hydroseeding is often the right replacement for failed sod
After sod fails the natural instinct for many homeowners is to replace it with sod again — the logic being that if the first installation had worked the sod would have been fine. This reasoning is worth examining before committing to another sod installation.
If the sod failure was caused by site-specific conditions — compaction soil quality drainage problems or timing issues — replacing with sod on the same site without correcting those conditions creates the same establishment challenge for the replacement sod. The conditions that caused the first failure are still present.
Hydroseeding as a sod replacement addresses the underlying conditions more effectively than repeat sod installation for several reasons.
The preparation required before hydroseeding — mechanical loosening of compaction topsoil addition grade correction — directly addresses the soil condition causes that contributed to sod failure. After that preparation hydroseeded grass grows from seed in the corrected soil conditions rather than being transplanted from a different soil environment into the uncorrected conditions that caused the first failure.
The cost of a hydroseeding application is typically significantly less than the cost of replacement sod installation for the same area — meaningful when the homeowner has already spent money on a first installation that failed. The financial case for hydroseeding as a replacement rather than repeat sodding is often compelling purely on economics.
Hydroseeded grass develops a root system that is native to the specific soil conditions of the property from germination onward. There is no transplant transition to navigate — the grass develops exactly where it will live from the first day. On the heavy clay soils of North Texas this native root development often produces more durable long-term establishment than transplanted sod regardless of how well the sod transition went.
The timeline difference between sod replacement — instant coverage — and hydroseeding replacement — three to four weeks to establishment — is the primary trade-off. For homeowners who experienced sod failure and have already waited through a disappointing establishment period three to four more weeks for a hydroseeding establishment that actually succeeds is a reasonable alternative to the cost and uncertainty of repeat sod installation.
Preparing the site for hydroseeding after sod failure
The preparation needed before hydroseeding a failed sod area depends on what caused the failure and what condition the failed sod has left the surface in.
Remove failed sod completely before hydroseeding. Dead or dying sod left in place creates a thatch-like layer between the new seed and the soil that prevents seed-to-soil contact and produces the same poor germination that overseeding onto thick thatch produces. The dead sod also harbors any pathogens or pest problems that contributed to its failure — leaving it in place exposes new seed to the same threats. Strip or kill the failed sod and clear it from the surface before any new seeding approach begins.
After sod removal assess the soil condition honestly. If the soil under the failed sod is visibly compacted — grey dense clay that shows no give underfoot — mechanical loosening is needed before hydroseeding produces better results than the sod that failed above it. Aeration for moderate compaction skid steer or tilling for severe compaction creates the soil structure that the new grass needs to develop root depth rather than repeating the shallow establishment that contributed to the sod's failure.
Address drainage problems identified from the sod failure pattern. Low spots that collected water and contributed to root rot or waterlogging need grade correction before reseeding. Consistently dry areas that suggest irrigation coverage gaps need irrigation adjustment before the next establishment attempt.
Topsoil or organic matter addition where soil quality is clearly inadequate gives the new hydroseeding application a better growing medium than the compacted clay that the failed sod struggled in. Even a thin quality topsoil layer worked into the loosened soil surface improves germination and early establishment on properties where the native clay is particularly poor.
Timing replacement hydroseeding after sod failure
The timing of replacement hydroseeding after sod failure should align with the optimal seasonal window for the chosen grass type — not simply the date when the sod failure becomes unacceptable to live with.
If failed sod is identified in early summer a spring window has closed but summer hydroseeding with Bermudagrass is a viable path forward. Summer applications require the intensive irrigation management that any summer Texas establishment demands — but the soil temperature conditions are favorable for fast Bermuda germination and the growing season ahead is sufficient for solid establishment before fall dormancy.
If failed sod is identified in late summer or fall the timing options depend on the grass type. Bermudagrass replacement should wait for the following spring when soil temperatures are reliably in the germination range — a late summer or fall Bermuda establishment risks going into dormancy before adequate establishment is complete. Tall Fescue replacement can proceed in fall — the optimal window for cool-season grass establishment in North Texas.
Rushing replacement hydroseeding into a timing window that does not align with the chosen grass type produces a second establishment failure for a different reason than the first. Patience to wait for the right timing window combined with the preparation work done during the waiting period sets up the replacement application for a result that the original sod installation never achieved.
What to expect from hydroseeding as a sod replacement
Homeowners replacing failed sod with hydroseeding should approach the replacement project with accurate expectations about the timeline and process differences from the sod experience.
The mulch-covered appearance of a fresh hydroseeding application looks nothing like freshly installed sod. Where sod provides immediate green coverage a hydroseeded surface looks like a green mulch mat for the first week before germination becomes visible. This is the visual trade-off for the lower cost and better long-term establishment that hydroseeding provides.
Germination in five to seven days on a well-prepared surface under favorable soil temperatures and consistent watering is typical for Bermudagrass hydroseeding in the DFW area. The progressive filling in of coverage through weeks two through four and the first mow at weeks four through five follow the same timeline as any hydroseeding application.
The comparison that matters is not hydroseeding establishment versus sod appearance on day one. It is hydroseeding establishment at week four compared to the failed sod that it is replacing. A properly established hydroseeded lawn at week four is in a fundamentally better position than failed sod at any point in its short history — because it has developed genuine root integration with the native soil rather than the failed root transition that caused the sod to decline.
The bottom line on replacing failed sod with hydroseeding
Sod failure in Texas is a real and common experience driven by the specific challenges of transplanting grass onto heavy clay soils in a climate that punishes inadequately established root systems quickly and severely. The right response to sod failure is not simply repeating the same approach — it is understanding what caused the failure correcting those conditions and choosing an establishment method that addresses the underlying soil challenges rather than repeating the transplant dynamic that failed the first time.
Hydroseeding on properly prepared soil gives replacement grass the best possible starting conditions — native root development in corrected soil with the protective establishment environment that produces the reliable germination and genuine root establishment that the failed sod never achieved.

Had sod fail on your property and not sure what to do next?
Fox Hydroseeding LLC assesses every situation personally and gives you an honest evaluation of what caused the failure and what the right replacement approach looks like for your specific property. We handle the preparation and the application so the replacement gets done right.
Get Your Free Estimate → foxhydroseeding.com/contact
Bring Your Property to Life With Expert Hydroseeding
Find Us On


