


Hydroseeding timeline expectations — why patience is the most important ingredient in a successful lawn
The most common source of anxiety after a hydroseeding application is the feeling that things are not moving fast enough. Day three arrives and the yard still looks like a green mulch mat. Day seven comes and the sprouts are thin and scattered rather than the thick carpet that was imagined. Week two and the coverage looks uneven with some sections ahead of others. At every stage the temptation is to conclude that something is wrong and to intervene in ways that often cause the very problems the homeowner is trying to prevent.
Most hydroseeded lawns that look wrong at week two are actually on track. Most interventions triggered by impatience do more harm than the situation they were trying to fix. And most of the homeowners who call their contractor in a panic at day ten with photos of sparse germination end up with excellent lawns by week five — because they were never actually in trouble.
This guide is about understanding why the hydroseeding timeline looks the way it does at every stage why slower-seeming progress is often completely normal and how to tell the difference between a lawn that is establishing correctly and one that actually has a problem worth addressing.
Why hydroseeding looks slower than it feels like it should
The expectation gap that causes most hydroseeding anxiety comes from a mismatch between what the homeowner imagines the timeline will look like and what the biology of grass germination actually produces.
Most people imagine that a lawn seeded with quality product under professional application will show rapid uniform coverage within a week or two — green everywhere consistent thickness the beginning of what will clearly become a lawn. That expectation is not unreasonable given how fast other things seem to happen in a construction and home improvement context. But grass does not follow the same pace as a paint job or a floor installation.
Grass germination is a biological process governed by soil temperature moisture and seed physiology — not by the pace of the home improvement project around it. The timeline to visible germination for Bermudagrass in warm DFW summer conditions is five to ten days. For Fescue in fall conditions it is similar. Full even coverage across the entire seeded area takes three to four weeks from application. A mowable established lawn takes four to six weeks.
Those timelines feel slow relative to the anxiety of looking at bare or sparsely covered ground every day. But they are the actual timelines that biology produces under good conditions. Understanding them accurately before the application day prevents the anxiety that drives the damaging interventions that happen when homeowners expect a faster result.
What normal looks like at every stage — and why it looks that way
The appearance of a hydroseeded lawn at each stage of establishment has specific characteristics that are normal and expected — and that often look alarming to homeowners who do not know what to expect.
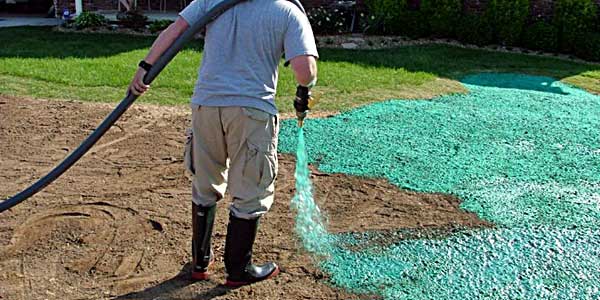
On application day the yard is covered in a uniform green layer from the mulch dye. The color is vivid and even and the lawn looks like something is already happening. Nothing is actually happening yet above the soil surface — the seed has just been placed in the conditions it needs to germinate and the mulch layer is beginning the bonding process that will hold everything in place. The vivid green color will fade as the mulch dries and begins biodegrading. This fading is normal and expected.
Days one through five the yard looks exactly the same as it did on application day except that the mulch color has faded somewhat as it dried. There are no visible sprouts. The surface looks like a mat of dried fiber rather than the vivid slurry it was on application day. This is the period when homeowners most commonly conclude that nothing is happening when in fact germination is underway beneath the surface. The seed has absorbed moisture softened its outer coating and is producing the first root and shoot structures that will break the surface in the coming days. None of this is visible yet.
Days five through ten the first sprouts begin breaking through the mulch surface. They are thin — a single hair-like structure emerging from the mulch in scattered locations rather than uniform coverage. The early sprouts are concentrated in the areas with the best sun exposure and soil contact and are largely absent in shaded areas or sections where contact was less ideal. This uneven early germination looks like a problem but it is the expected pattern of germination across a varied surface. The sections that appear bare at day seven are not failed sections — they are sections where germination has not yet reached the surface emergence stage.
Days ten through fourteen germination spreads across the full surface. The scattered individual sprouts of the first emergence window are joined by sprouts in previously bare-looking areas and the overall coverage picture begins showing visible progress. The mulch color continues fading as the fiber biodegrades and the green emerging from the surface is increasingly the color of grass rather than the dye of mulch. This is the stage where the transition from mulch mat to lawn first becomes visible.
Weeks two through four visible growth and thickening happen progressively. The lawn does not jump from sparse to full overnight — it fills in gradually over this window with each week showing meaningfully more coverage than the previous one. The earlier-germinating sections are growing taller and thickening while the later-germinating sections are catching up. By the end of week three most lawns in the DFW area look like a clearly establishing lawn — thin by mature standards but green consistent and headed in the right direction.
Week four and beyond the lawn reaches the visual milestone of clearly established coverage across the full area. The mulch has largely disappeared. The grass is growing consistently. First mow timing is approaching. The anxiety of the early weeks is typically replaced by satisfaction at this point — the lawn that looked like it was behind at day ten is clearly on track.
Why uneven early germination is normal and not a sign of failure
The most common specific anxiety trigger in early hydroseeding establishment is uneven germination — the observation that some areas of the yard are showing sprouts while other areas appear untouched. This unevenness at days seven to fourteen is one of the most reliably misinterpreted aspects of hydroseeding progress and one of the most common reasons homeowners call their contractor unnecessarily.
Uneven early germination is caused by real differences in conditions across the yard surface — differences that affect the timing of germination without affecting the ultimate outcome. Soil temperature varies across the yard surface — sections in direct sun warm faster than sections in shade and the temperature difference of even a few degrees significantly affects germination timing for Bermudagrass which is highly temperature-sensitive. Seed-to-soil contact varies slightly even in a quality application — sections where the slurry bonded most directly to the soil surface germinate earlier than sections where the contact layer was slightly thicker. Moisture distribution across a yard is never perfectly uniform — sections that retain moisture slightly better than adjacent sections activate germination earlier.
All of these variations are temporary. By days fourteen to twenty-one most of the late-starting sections have caught up with the early starters and the overall coverage is much more uniform than the day ten picture suggested. The sections that looked dead at day ten are rarely actually failed sections — they are sections where the specific combination of soil temperature moisture and contact took slightly longer to reach the germination threshold.
The interventions that impatience causes and why they make things worse
The damaging interventions that patient homeowners avoid and impatient ones commonly make follow predictable patterns.
Probing or disturbing the mulch layer to check on germination progress is one of the most common early-establishment mistakes. Lifting or displacing the mulch in areas that are not yet showing sprouts disrupts the moisture environment and physical contact that germination depends on — potentially aborting germination that was underway in those sections. The sections that looked bare at day ten and got probed at day twelve may genuinely be bare at day twenty because the probing disrupted the process rather than revealing a pre-existing failure.
Applying additional seed on top of a normally establishing lawn at week two because coverage looks thin creates a second germination cohort that produces an uneven unmanageable lawn with grass of wildly different ages rather than the uniform established lawn that was developing at the normal pace.
Changing the watering schedule dramatically — either dramatically increasing frequency in the belief that the lawn is not getting enough water or reducing frequency because germination is visible and seems like it is going well — disrupts the establishment momentum that consistent watering was building. The right response to a normally establishing lawn at every stage is to maintain the appropriate schedule for the current phase rather than adjusting based on the visual appearance of progress.
Applying herbicide or fertilizer products during the establishment window before the lawn is ready for them damages the establishing grass in ways that can set back or kill sections that were developing normally.
How to tell the difference between normal slow progress and an actual problem
The goal of understanding what normal looks like at every stage is not to prevent homeowners from recognizing real problems — it is to help them distinguish between the anxiety of watching a biological process unfold at its natural pace and the real signs that something is actually wrong.
Complete absence of germination anywhere on the surface at day fourteen or beyond is a signal that something is wrong rather than slow. Normally developing lawns show at least scattered germination by days seven to ten. If nothing is visible by day fourteen — not thin germination but zero germination anywhere — the issue is worth investigating. Watering adequacy seed-to-soil contact soil temperature adequacy and potential washout or application issues are the areas to assess.
Consistent bare areas that have shown no progress while all surrounding sections have developed germination by week two represent sections where something specific to those locations prevented germination. Shade that is creating a temperature or light problem drainage that is creating waterlogging in those sections or areas where the application did not achieve coverage are specific location causes worth identifying.
Mulch that has washed off sections leaving bare soil visible — particularly on slopes after a rain event in the first 48 hours after application — represents real displacement that may need a touchup application. The visual signature of washout is distinctive — channels where mulch has moved and bare soil is exposed along those channels rather than the even fading of the mulch that normal biodegradation produces.
Changes in the already-germinated sections — yellowing wilting or dying of sprouts that were previously developing normally — signal a problem affecting the developing seedlings rather than a germination timing issue. Waterlogging from overwatering fungal disease from evening watering that keeps the surface wet overnight or nutrient deficiency are potential causes.
Outside of these specific signals the appropriate response to slow-looking progress in a hydroseeded lawn during the normal establishment window is continued adherence to the correct watering schedule and patient observation rather than intervention.
The payoff of patience done right
The homeowners who resist the anxiety of the early establishment window maintain the correct watering schedule through the full germination period and trust the process without intervening in ways that disrupt it consistently end up with the best lawns. Not because patience is a mystical ingredient but because the things patience prevents — the mulch disturbance the premature schedule changes the unnecessary product applications — are the interventions that most reliably damage lawns that were establishing correctly.
A hydroseeded lawn on a properly prepared surface with appropriate seed applied at the right time of year under consistent watering produces the result it is capable of producing when left to develop at the pace that biology determines. That pace is three to four weeks to solid coverage and four to six weeks to full establishment — not three days to a green lawn but also not months of uncertainty. It is a defined predictable timeline that delivers exactly what was invested in when the conditions and the patience are both present.
The bottom line on hydroseeding timeline expectations
The most important thing to know before a hydroseeding application is what normal looks like at every stage of the timeline — not because the process is complicated but because the visual cues that cause the most anxiety are almost always signs of a normally establishing lawn rather than a failing one.
Understand the timeline. Know what each stage looks like. Maintain the watering schedule. Resist the interventions that impatience suggests. And trust that the lawn developing under the mulch mat on day five is on its way to the result you invested in — even when the yard still looks more like a construction site than the lawn you imagined.

Have questions about what is happening with your hydroseeded lawn?
Fox Hydroseeding LLC is owner-operated and personally available to answer timeline and establishment questions for every lawn we apply. We walk every homeowner through what to expect before we leave the job site — and we are here when questions come up during the process.
Get Your Free Estimate → foxhydroseeding.com/contact
Bring Your Property to Life With Expert Hydroseeding
Find Us On


